Sometimes we make text bold to grab the attention of our Audience. But this hack is only working for Web pages or documents we have in the form of PDF or Word.
But what if we need to design certain words to stand out from the rest of your text. You may have seen these effects in logos, book covers and as well as on YouTube thumbnails.
Photoshop provides countless options for colours, borders, opacity, texture, and 3D Effects to design our text the way we want.
In this article, we will look at how to outline text and add borders around the text using Photoshop with step-by-step guides.
Read Also: How to Blur in Picsart
How To Outline Text In Photoshop
Let’s see how can we apply border and outline to text in Photoshop to make your text stand out.
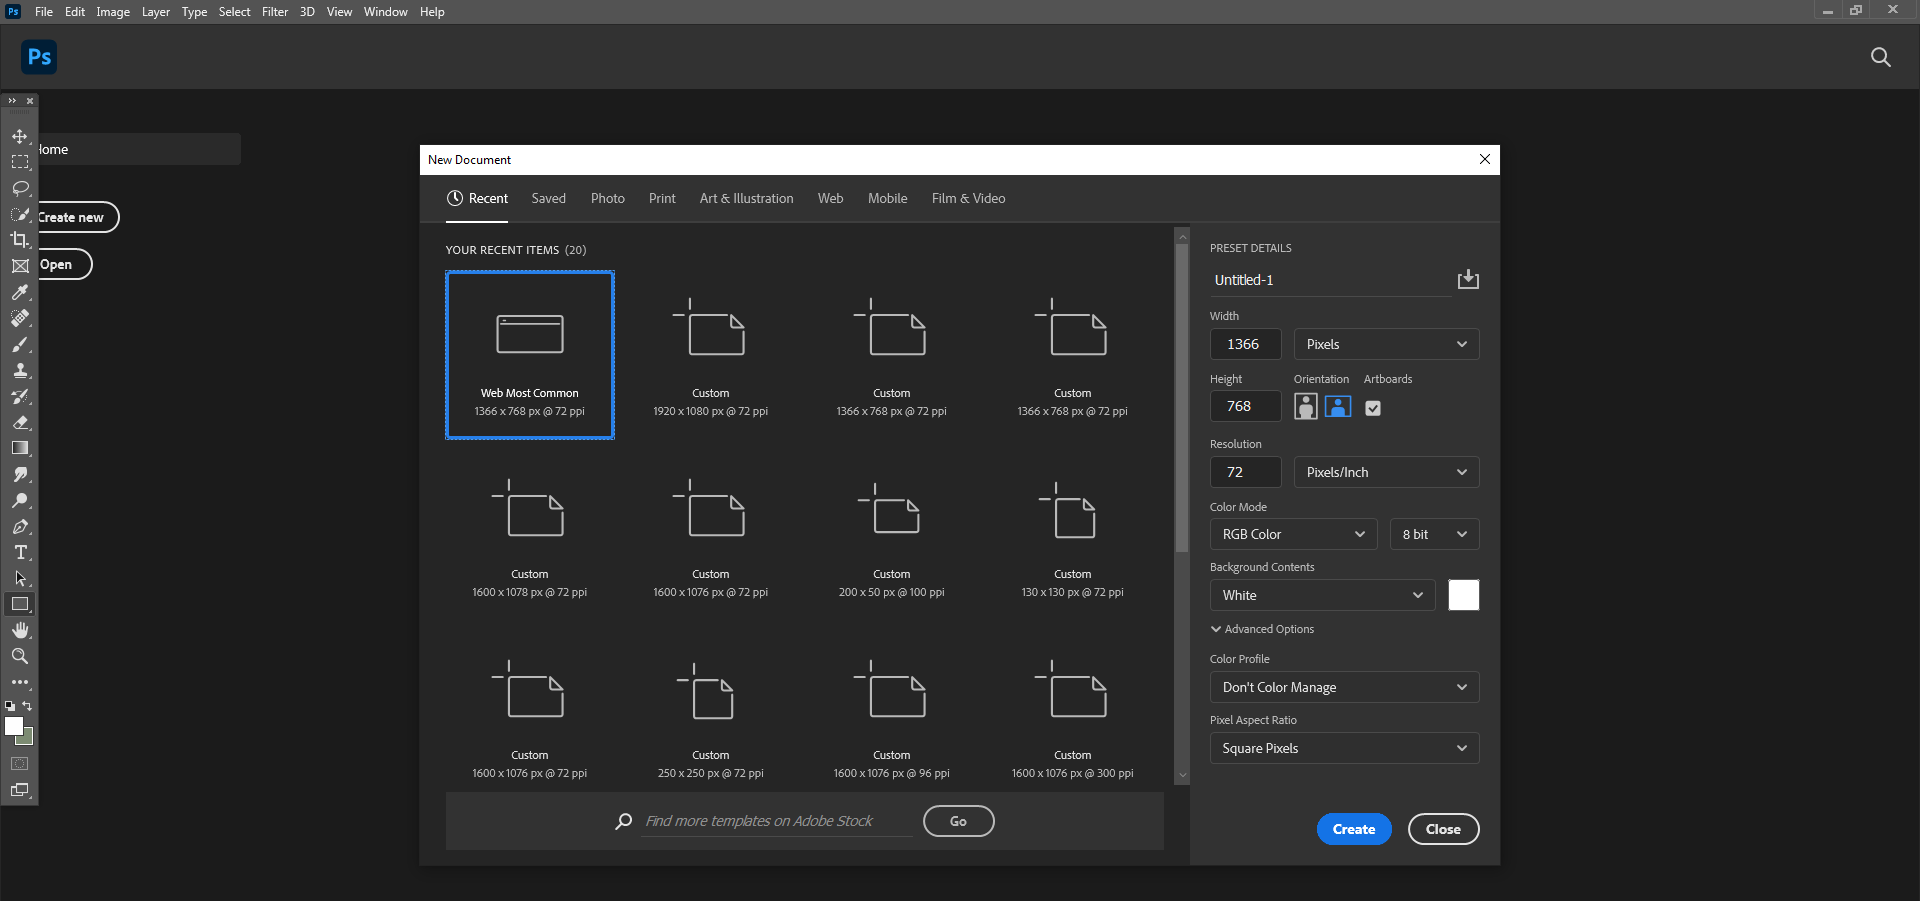
Step 1: Launch Photoshop and Create a New Document
Open Photoshop and Create a New Canvas. In this case, I am creating Web Most Common whose sizes are equal to 1366px width and 768px height.
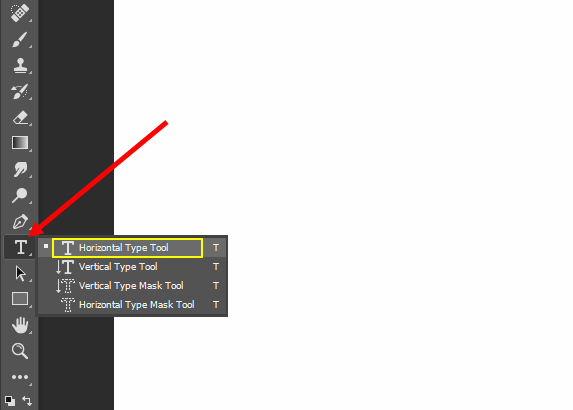
Step 2: Select Horizontal Type Tool
Select Horizontal Type Tool and type the text that you want to Outline.
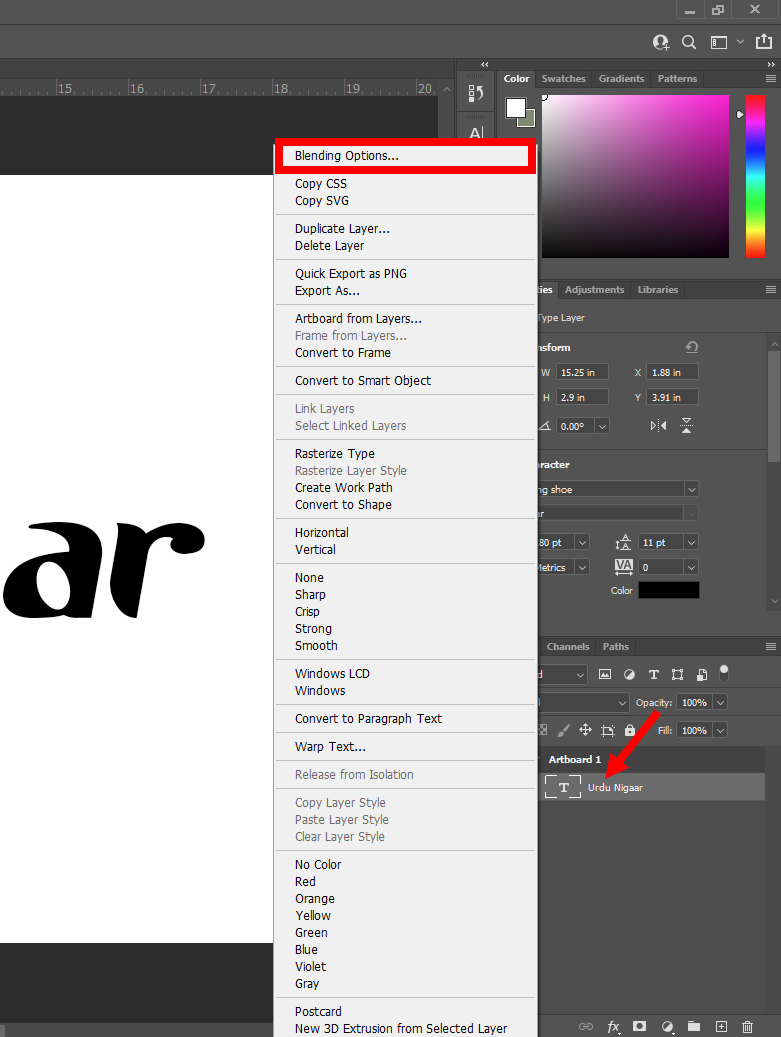
Step 3: Choose Blending Option From Text Layer
Right-Click on the Type Layer and Choose Blending Option from the menu.
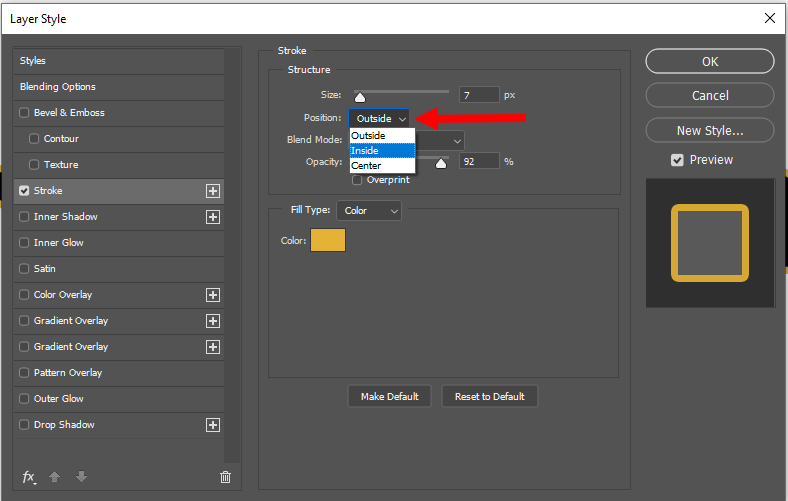
Step 4: Apply Stroke, Color and Outline
In the Layer Style Tab, Check on the Stroke Option and give it the colour you want. You can also adjust the Stroke Size to make your text border extra thicker in outline.
Step 5:Applying Best Postion For Otline Text
You can also apply position properties to your outline text to get a better result. There are three options outside, inside and center. We recommend setting the Outside position option for better results.
Here’s what we’ve got so far:
Final Thoughts
We have shared a step-by-step easy guide about adding outlines and borders to text using one of the most popular Graphic Software in the market name Photoshop.
Read Also: How to Add Videos to TikTok Draft
We hope this guide helped you learn how to outline text in Photoshop and make it distinctive.


